
Before a 209 report can be finalized following approval, information entered in the report must be verified for accuracy, omissions, errors and other discrepancies. Any inconsistencies or errors are flagged, and must be corrected before the document can be finalized.
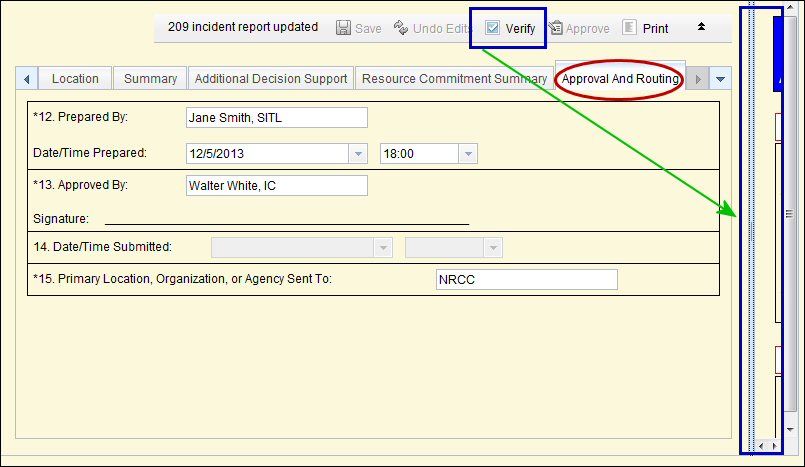
Verification is done in the SIT/209 Report Not Approved pane of the application. To adjust this pane, use the computer mouse to grab and slide the divider (shown via the GREEN arrow below) to the left to maximize, or to the right to minimize a window pane. The verification pane is visible on the right below the blue banner in the example below.
Verification Outputs
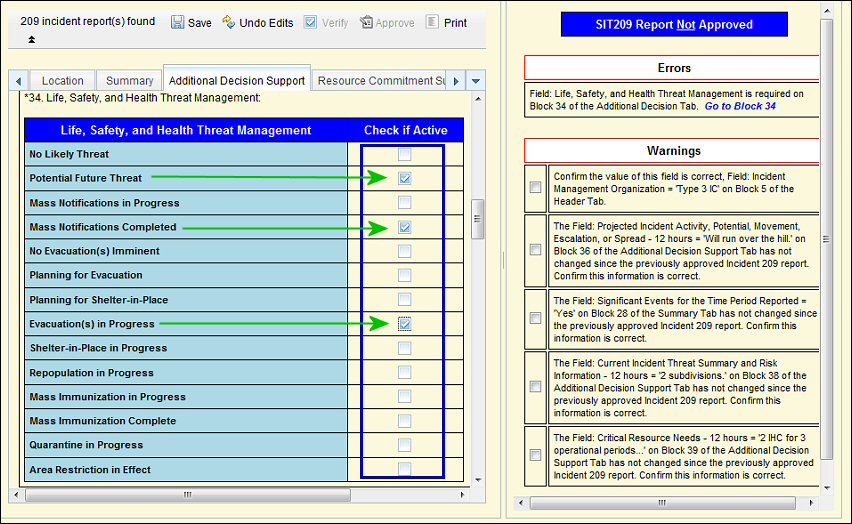
The application reports two kinds of output when the SIT209 data is not verified: (1) Errors and (2) Warnings.
- Errors are items that must be corrected before a report can be approved. Each error will identify the block number (arrow) where the error occurred. The nature of the error is also noted. Click the blue text link to go to that block and correct the error (see graphic below).

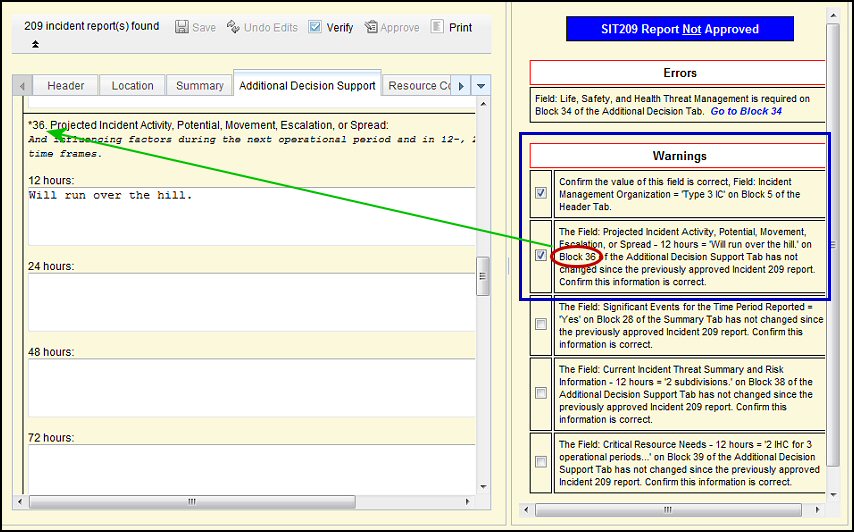
- Warnings are discrepancies found in information entered into the application.
For example, possibly too many zeroes entered in a field. Warnings simply ask if the information entered in certain key blocks or fields is accurate. If correct, then click the check box to the left of the warning statement to indicate that the information entered is accurate (see graphic below).
If the information is not accurate, return to that block or field and correct the information. Be sure to save the changed or corrected information before exiting the tab.
- Status Bar Messages (located at the bottom of the screen) need to be read as well. The application will approve the document, however if there are error messages in the Status Bar the information from the document will not flow through IRWIN and into other pertinent applications.
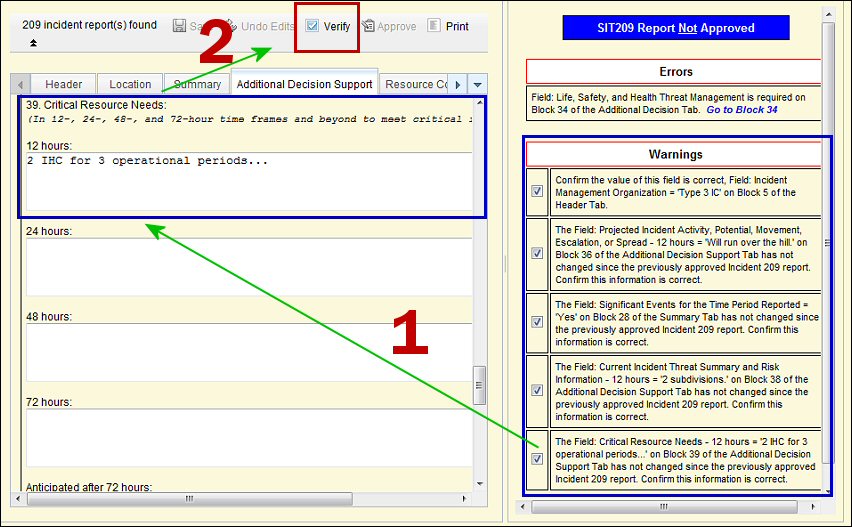
- Once errors and warnings have been corrected or validated, click Verify a second time to verify the changes or corrections made. The application allows the 209 report to be finalized and submitted. A date/time stamp is applied by the application in Block 14.
- Corrected Errors disappear from the Verify pane, but Warnings do not disappear (as shown below). All errors must be fixed, and all warnings checked off before the 209 report can be approved and finalized.
To complete the Verification process:
- Click Verify (shown above) to perform the 209 information verification check.
Verification must be performed before final approval and submission is allowed by the 209 application. The application performs a data verification process and shows the errors or discrepancies found in the Verify pane – see example below.
- Correct any reported Errors and/or Warnings when the SIT209 Report is not approved.
- Click Verify a second time to submit the SIT209 Report. If there are any errors, they will display again in the Verification pane.
- When all Errors and Warnins are completed and the report is ready for submission, click Approve once again.
- If everything is correct, the "Date/Time Sumitted in Block 14" will display in gray. Your 209 is now approved and available for printing and viewing by others.
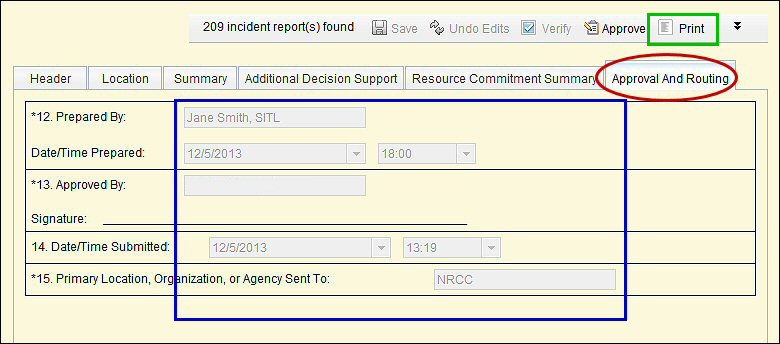
- You are now ready to print.
Incident List
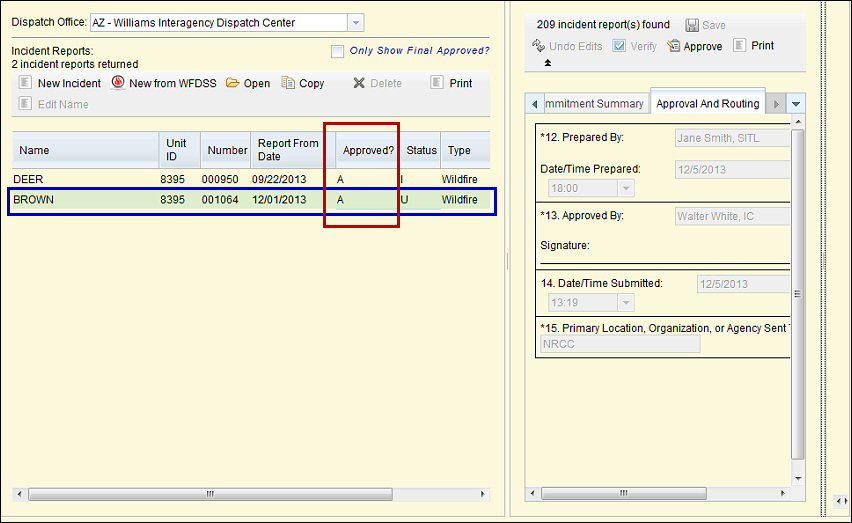
With the "Approval" process completed, the 209 report will appear stamped as "Approved" (i.e. "A") in the dispatch center list of incidents pane (as shown below).
NOTE: In the "Status" column to the right of the "Approved?" column, the 209 report is marked with a "U" (i.e.Update). Subsequent 209 reports will show "U" until the Final (i.e. "F") is completed.
 = Required Entry
  = IRWIN Populated Field / 209 Reads from IRWIN